Upgrade your VCSA from 6.7U3 to 7 – Part 1
There’s no shortage of posts out there explaining how to upgrade your vCenter but seeing as I was upgrading from 6.7U3 to the recently launched 7, I thought I would run through the steps with you all.
Note: Before you start the upgrade, please ensure you have done your due diligence and checked the VMware HCL etc to ensure your environment is supported
- Ensure you have everything backed up & snapshots in place where applicable.
You will need a temporary IP address & Hostname for the Center while the upgrade is completed. - With the ISO mounted, locate the installer.exe
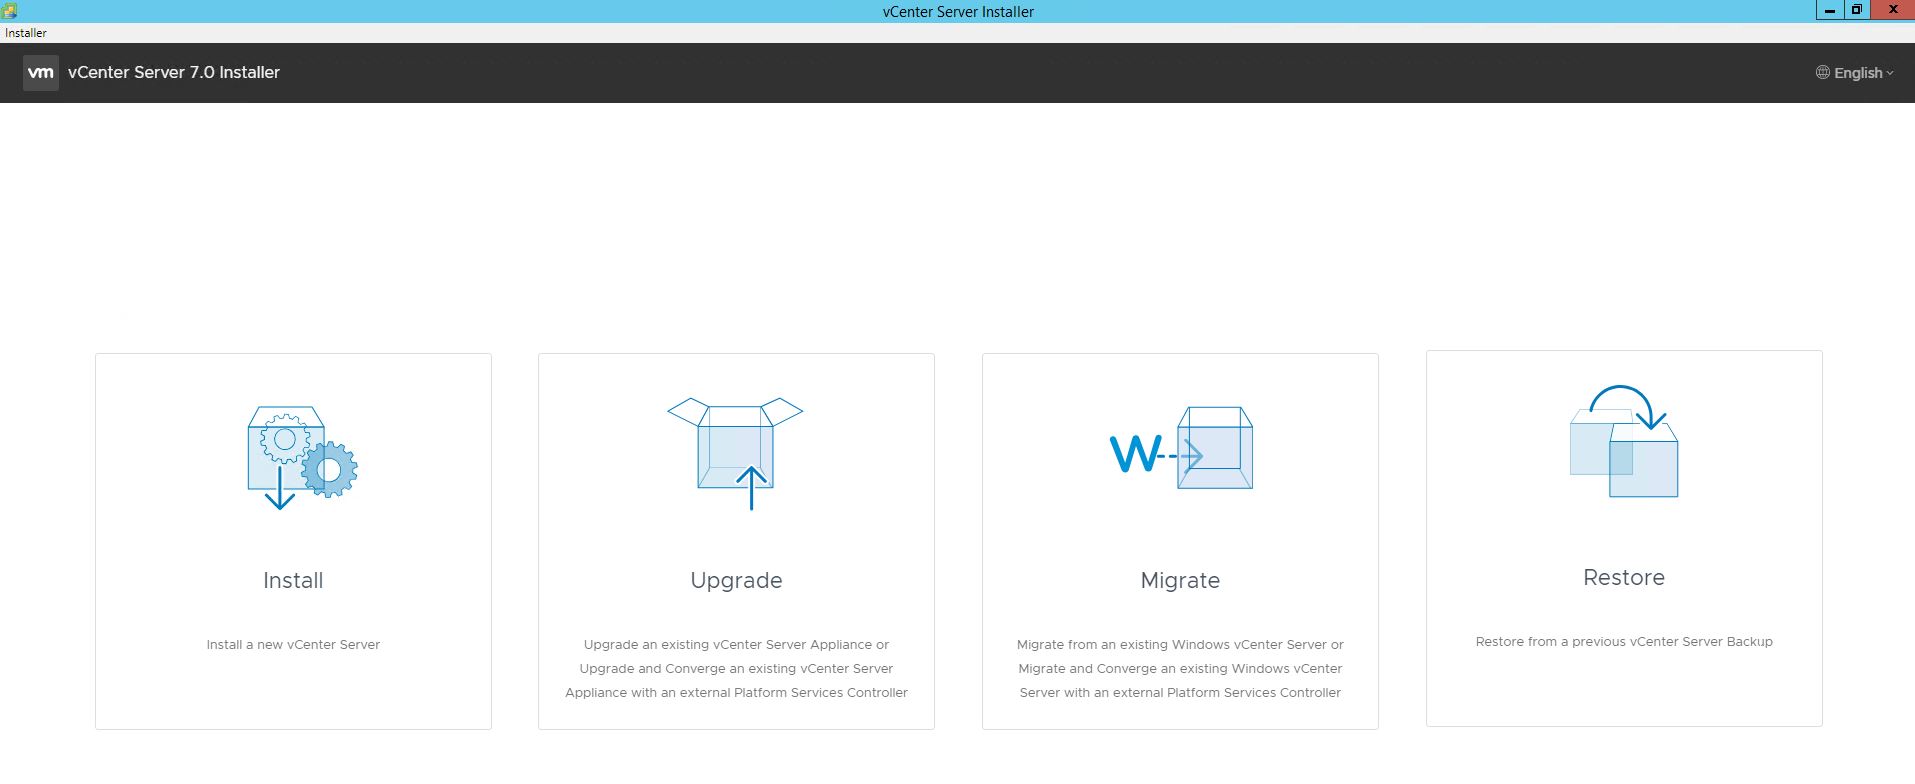
![](http://www.virtuallyphysical.co.uk/wp-content/uploads/2020/04/1-Find-Installer.jpg)
3. Select Upgrade
![](http://www.virtuallyphysical.co.uk/wp-content/uploads/2020/04/2-Select-Upgrade-1024x419.jpg)
4. Select “Deploy vCenter Server”
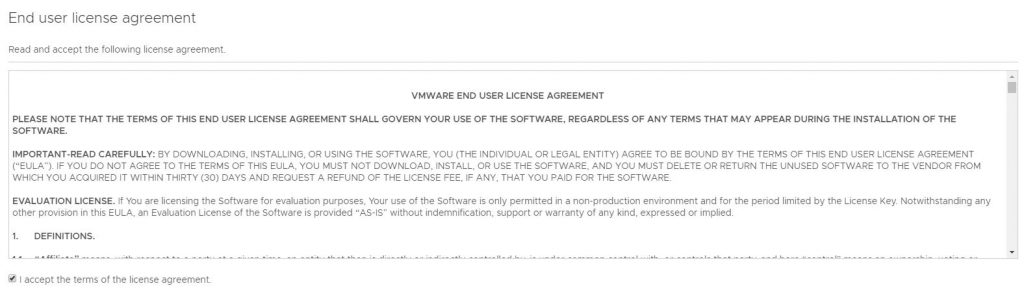
![](http://www.virtuallyphysical.co.uk/wp-content/uploads/2020/04/3-Stage-1-1024x290.jpg)
5. Accept the EULA
![](http://www.virtuallyphysical.co.uk/wp-content/uploads/2020/04/4-accept-eula-1024x288.jpg)
6. Enter your existing vCenter details followed by the host it is currently running on.
![](http://www.virtuallyphysical.co.uk/wp-content/uploads/2020/04/5-connect-to-vCenter-Host-1024x451.jpg)
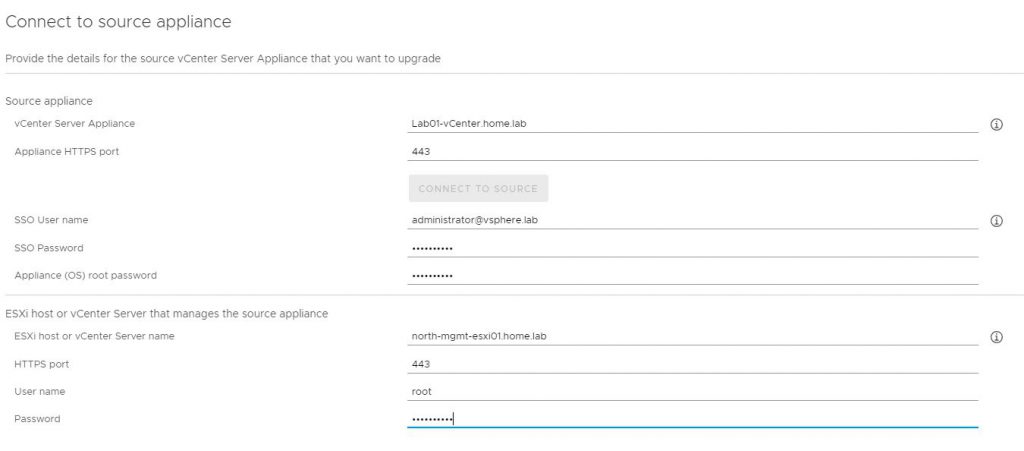
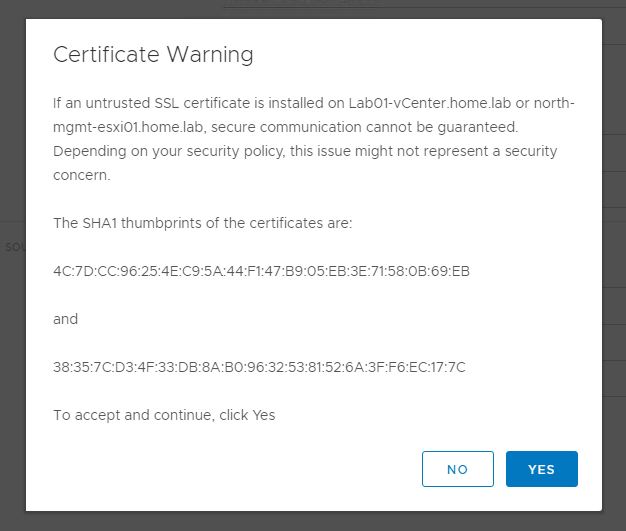
7. Accept any certificate issues and move on
![](http://www.virtuallyphysical.co.uk/wp-content/uploads/2020/04/6-accept-cert-warning.jpg)
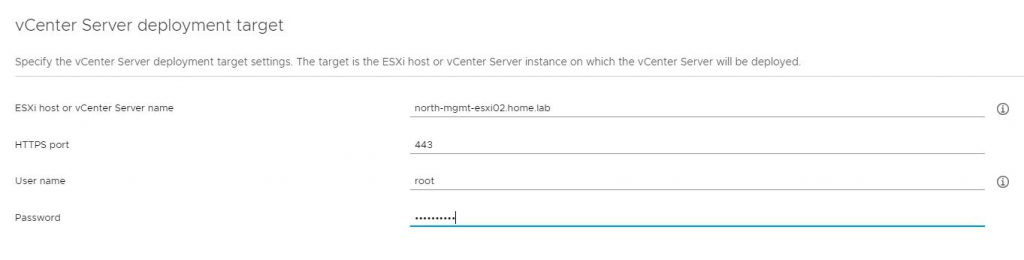
8. Enter the host details where your vCenter will be deployed. This can be the same as before or another host in the cluster
![](http://www.virtuallyphysical.co.uk/wp-content/uploads/2020/04/7-select-host-to-deploy-temp-vcsa-to-1024x260.jpg)
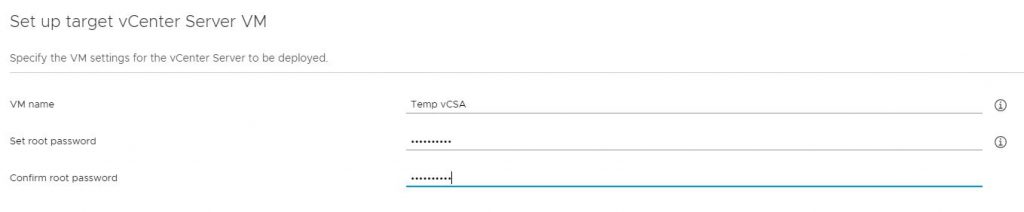
9. Enter the temporary VM Name & password
![](http://www.virtuallyphysical.co.uk/wp-content/uploads/2020/04/8-Specify-temp-name-1024x212.jpg)
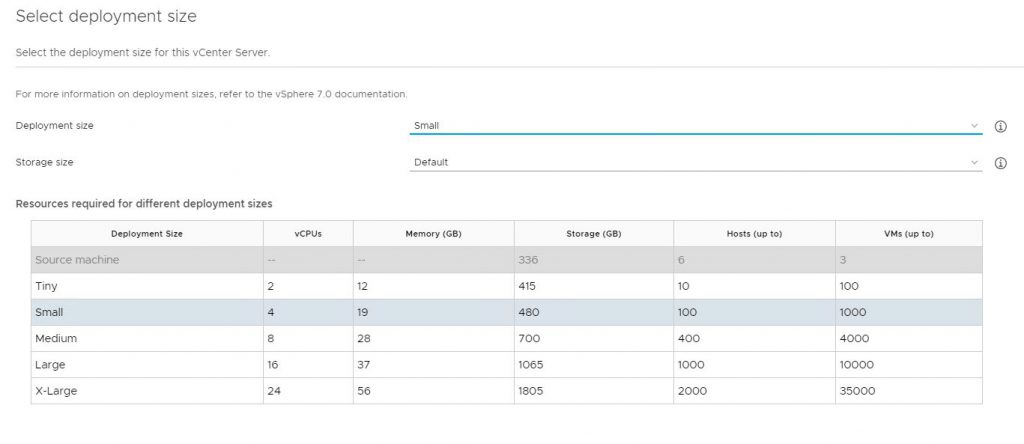
10. Select your deployment size, this doesnt need to be the same as your existing VCSA
![](http://www.virtuallyphysical.co.uk/wp-content/uploads/2020/04/9-Select-Deployment-size-1024x444.jpg)
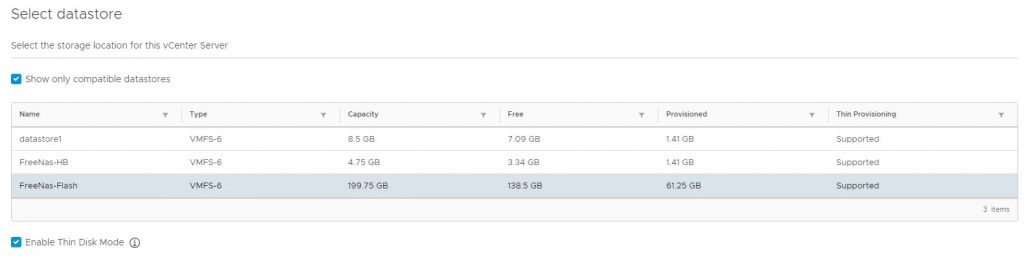
11. Select the datastore to deploy to
![](http://www.virtuallyphysical.co.uk/wp-content/uploads/2020/04/10-Select-Datastore-1024x259.jpg)
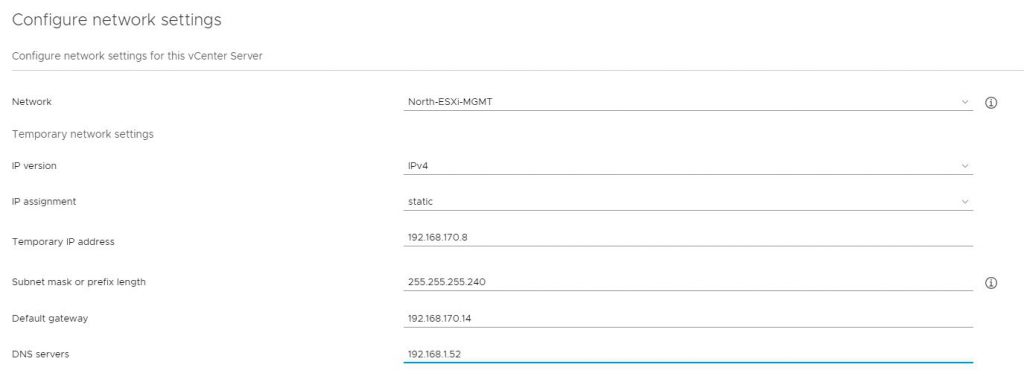
12. Enter your temporary IP information.
![](http://www.virtuallyphysical.co.uk/wp-content/uploads/2020/04/11-configure-temp-IP-1024x376.jpg)
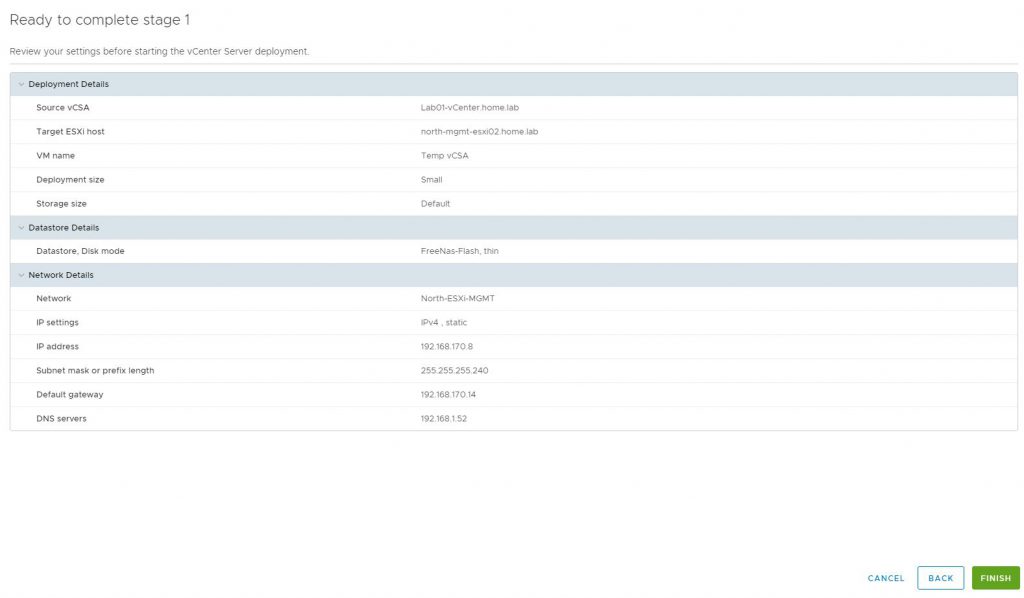
13. Confirm all the details are correct and then click finish
![](http://www.virtuallyphysical.co.uk/wp-content/uploads/2020/04/12-confirm-and-click-finish-1024x598.jpg)
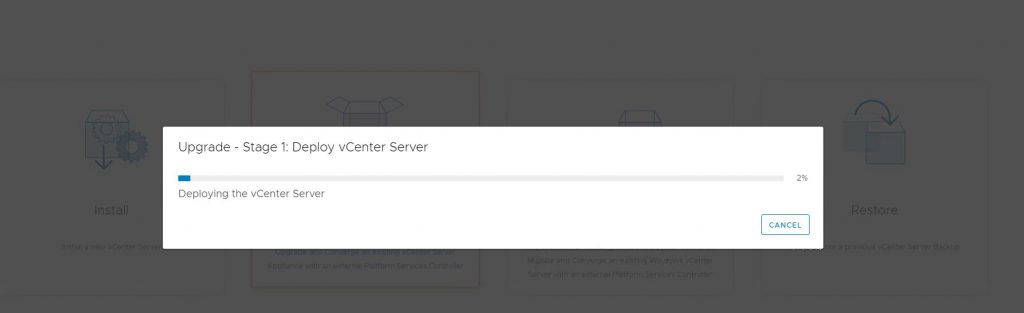
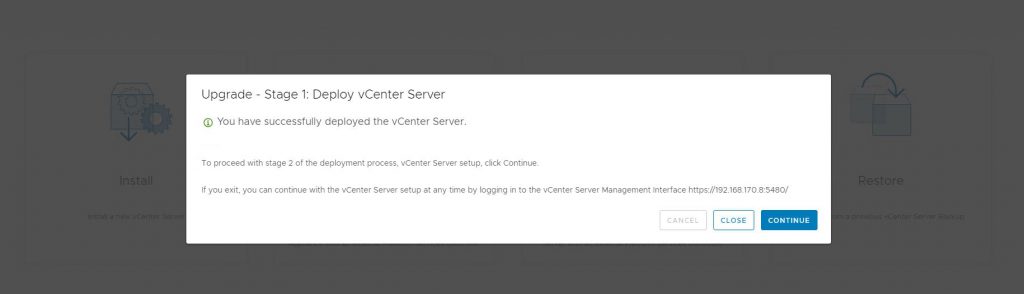
14. Wait for the deployment to finish
![](http://www.virtuallyphysical.co.uk/wp-content/uploads/2020/04/13-wait-for-deployment-to-complete-1024x313.jpg)
15. Once complete you can move onto the migration. See Part 2 HERE
![](http://www.virtuallyphysical.co.uk/wp-content/uploads/2020/04/14-continue-to-step-2-1024x294.jpg)